DIY: Drybags

Hello!
Drybags are great both on your canoe adventures and in your backpack when hiking. I've made my own drybags from a pair of cut off-jeans, linseed oil, a leather strap and carbines.
The pros' with these bags are many, there are no gore-tex, nor toxic spray in them, and hardly any plastic (except the nylon thread). And they're cheaper. The only con would be that one has to dry them very, very carefully. Linseed oil drying in cloth might self induce, so keep them drying outdoors over a fire proof drum, big pot or similar.
1. To begin with, you want to use a cloth as tightly woven as possible. You can do like me, using som scrap jeans legs or find yourself some cloth made for making pillows and duvets (cambric). If you hold the cloth towards a window or lamp, you'll se tiny lights peaking through, the less light the better.
If you're fastidious about the aesthetics, keep in mind that light colored fabrics will turn slightly yellow and dark cloths will turn even darker, when filled with oil.
Do you know already that you want to make several bags? Make them all at once, one step at a time, rather than finishing them one by one. At least for me personally, that's the only way I keep my spirits up enough to finish them all.

2. I started by cutting of about 5 cm, so that I got a straight edge. I keep the little cut off piece for later, se no 9.
If I use an ordinary piece of cloth I make a tube first with a folded seam. I make about 2,5 cm of seam allowance, sewing a straight seam. Then I cut away half of one of the seam allowances, fold the broader one over the slimmer so that the raw edge touches the first seam. Then I fold it flat against the cloth and fasten it with a straight seam.

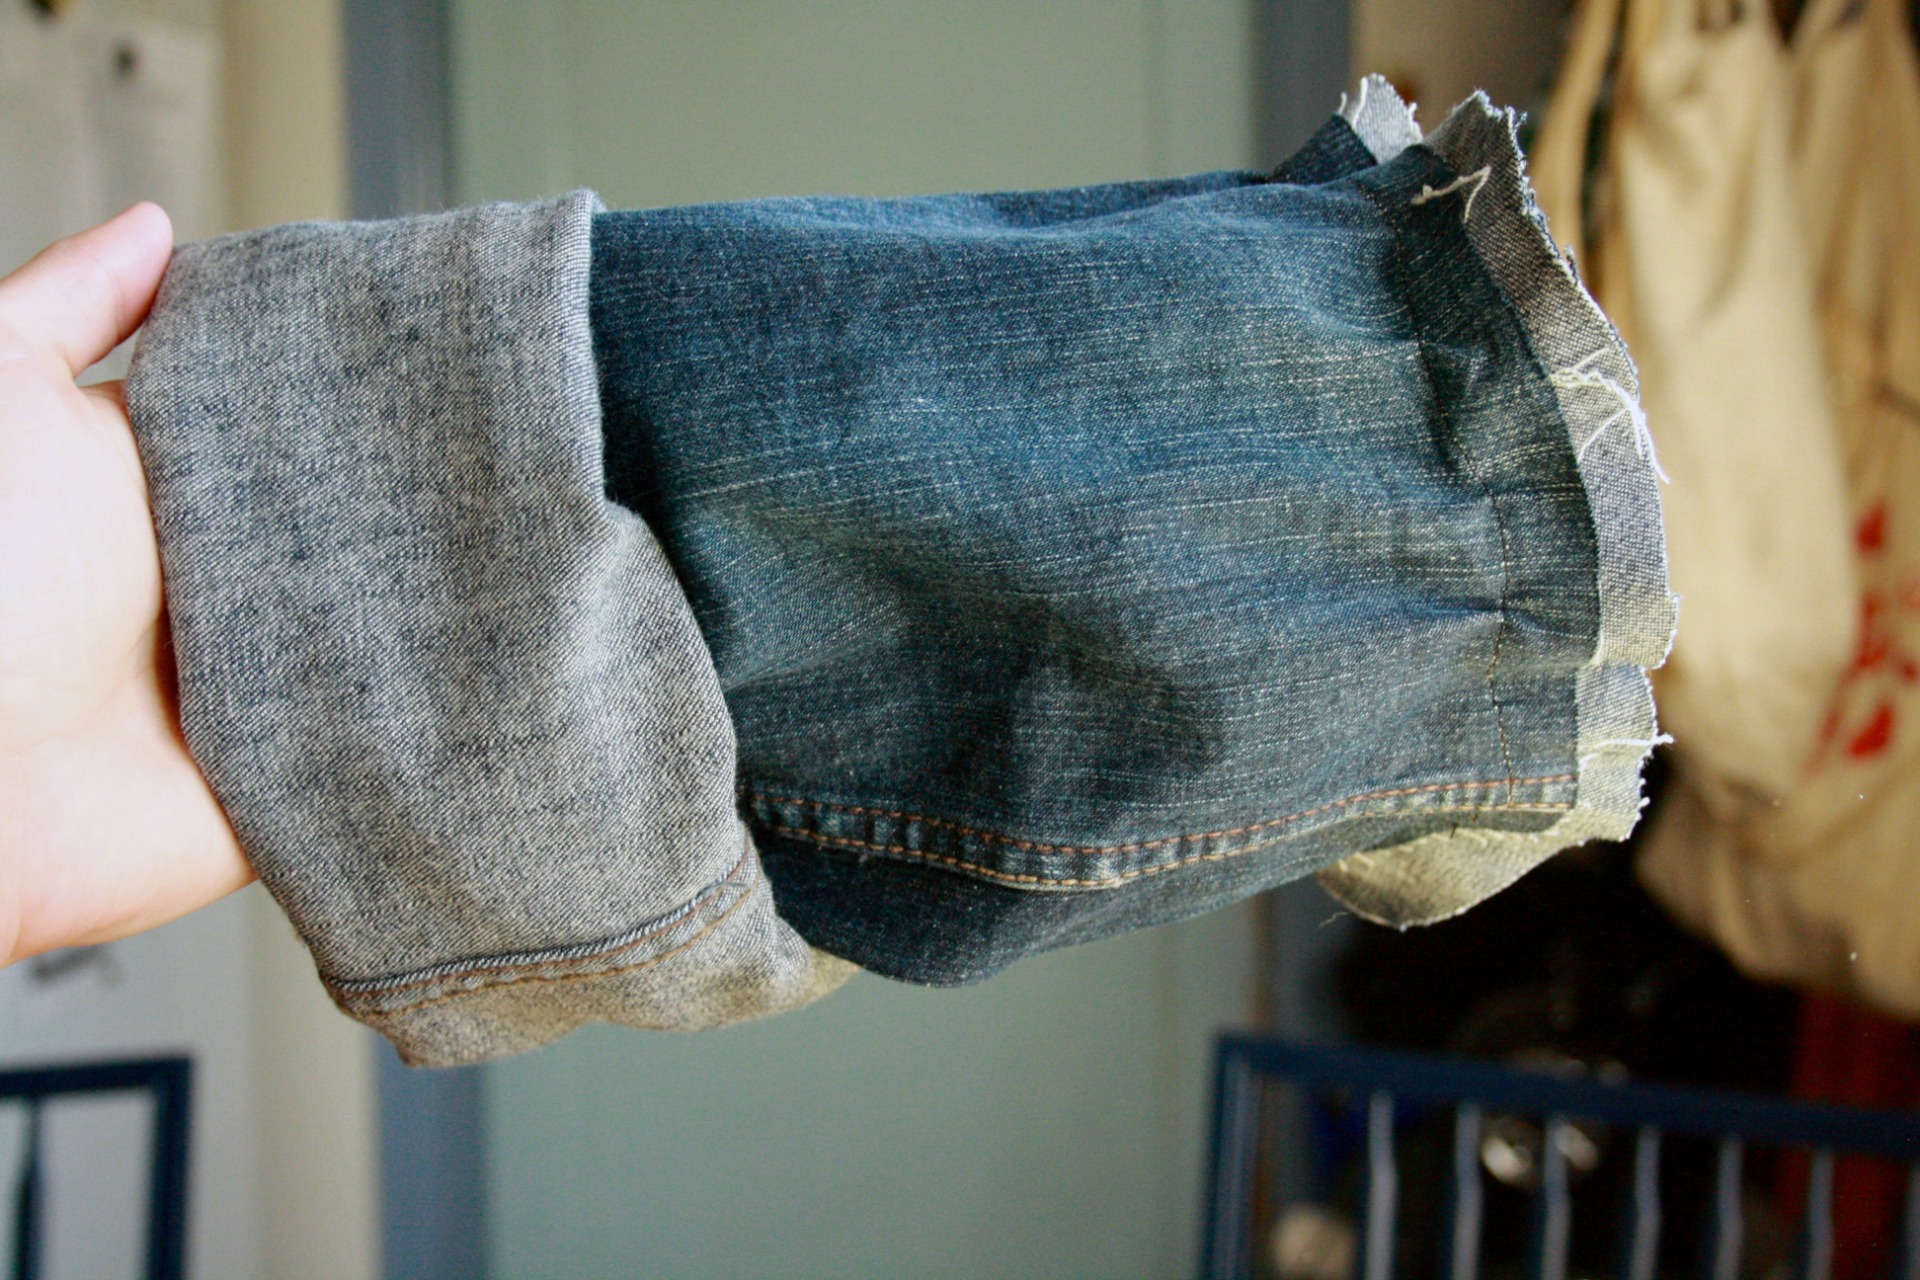
3. Then I find something round that fits in the tube without stretching the fabric too much. In this case - a bowl.
4. I put the bowl upside down on the other cut off leg and cut around it with about 1,5 cm for seam allowance.
5. I pin the round piece, so that the seam allowance peeps out. Then I sew the round piece in place.

6. Remove the pins and fold down the rim, so that the bag fits onto my sewing machine.
7. I then fold the seam allowance and pin it. I first put 4 pins in place opposite one another, folded in the seam alllowance between these 4 and then put as many pins as I had the patience to.
8. Once pinned and ready, I put the bag on to the sewing machine and sew all the way around. It's a bit bumpy but it makes the seam much stronger and more likely to keep water proof.
9. Now I go back to the piece I cut of in the first step. I cut away the thick seams and make them approximately the same size. Then I fold in the shorts and attach with straight seams. Fold in the long side, attach with straight seam. Fold in the other long side of the piece and fold the whole thing in half, then sewing along the edge so I'll get a sturdy strap with no loose threads.
11. I attach the thick straps, like loops on opposite sides of the edge. This is the moment when most sewing machines plea for mercy, so if you know you're running a modern machine, bring up the patience to stitch these straps by hand. I gave up after the third sewing machine-needle broke and stitched the rest by hand. I also took the opportunity to experiment a bit on another bag. I fastened a 3 mm thick leather strap to the edge, like you can see in the photo below. If you do so, make sure to fasten the ends of the seam properly, since these points will be torn most.

12. Hurra! Now you've a proper bag for gear! But it's not waterproof quiet yet.
13. Put the bag in a big bowl of stainless steel. Pour some linseed oil inside and on to the bag and massage the oil into the fibers. Be particularly careful by the seams. When you're done you can't see any structure of the cloth, yet if you squeeze the bag it won't drip.

14. Let it dry outside, with a fire proof barrel or pot beneath. How long it takes, depends on the size of the bag and the temperature outdoors. OBS! Very important! Burn all tissues with linseed oil in them. They might self induce and must not lay around or end up in your dust bin!
I must admit, that I'm not blessed with a lot of patience. So, after letting the bags drip off for 2-3 days, I brought them into the kitchen. I hung them up over my iron stove, made fire in the stove and settled in the kitchen for the day. When I wanted to do something else, or sleep, I simply brought the bags out and hung them back in my garden.
15. Now for the final test! Fill your bag with water. Did it leak? No - well done! Yes - mark the leak, dry the bag and put some extra linseed oil at the leak. Mine leaked by the seams. some more linseed oil, and some more patience should hopefully do the trick.

Good luck! Did you find this post inspiring? Please, share with friends and family. Have you made any bags? Please, share in Stories and tag @tracelessintiveden, so that we may inspire more people to create their own gear!
Sew in peace!
/Lovisa